- Log in to your Gmail account
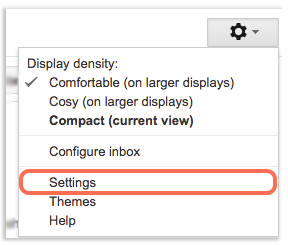
- Go to Settings
- Click the Accounts and Import category
- Next to Check email from other accounts, click Add an email account
- Next to Email Address, enter your email address
- Click Next
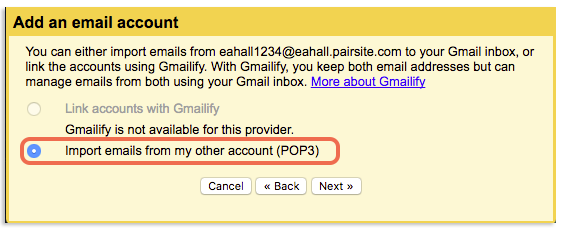
- Select Import emails from my other account (POP3)
- Click Next
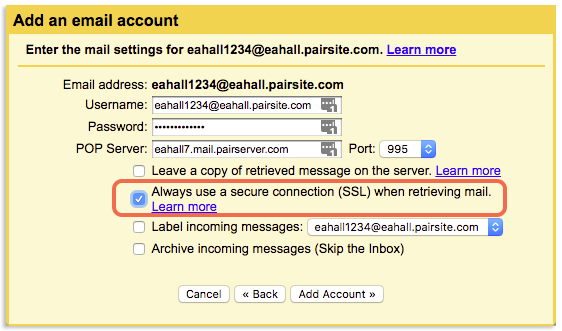
- In the next window, input your:
- In the Port drop-down, select 995
- Check the box next to Always use a secure connection (SSL) when retrieving mail
- Click Add Account
Step 4: Enabling Gmail to Send Mail as Your ACC Address
If you don’t want your responses to show that they’re coming from a Gmail account, you need to enable Gmail to respond as your mailbox.
Enabling Gmail to Respond as an your Mailbox
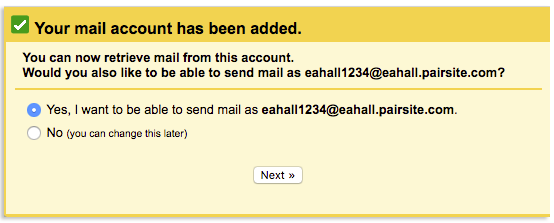
- On the next window, click Yes, I want to be able to send mail as
- Click Next
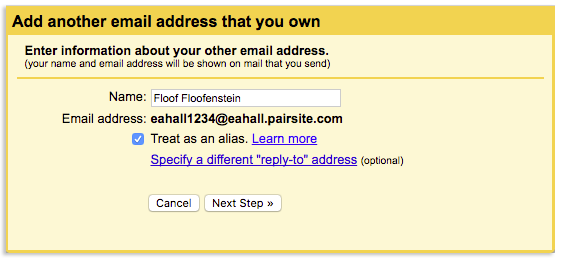
- In the pop-up box, enter your name in the allotted space
- Make sure Treat as Alias is checked
- Click Next Step
- Input your:
- Select whether you want a Secured connection using TLS or a Secured connection using SSL
- Select a port number
- Click Add Account
- You will be asked to confirm your email address. To check your mailbox, log in to webmail using your mailbox credentials.
- Once your email has been verified, return to the Account and Import section of Gmail Settings
- Go to the Send mail as section and, next to your email, click make default
- Under Replying to a message, select whether you want the Reply from the same address to which the message was sent or Always reply from the default address
Now you can send and receive mail from your email address through your Gmail account interface.

 Florida